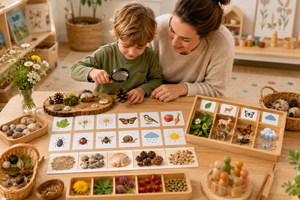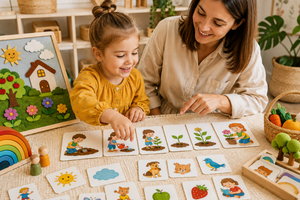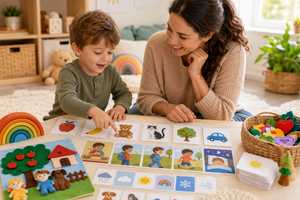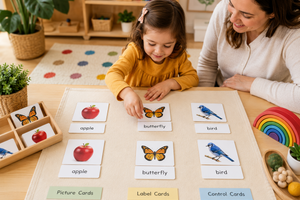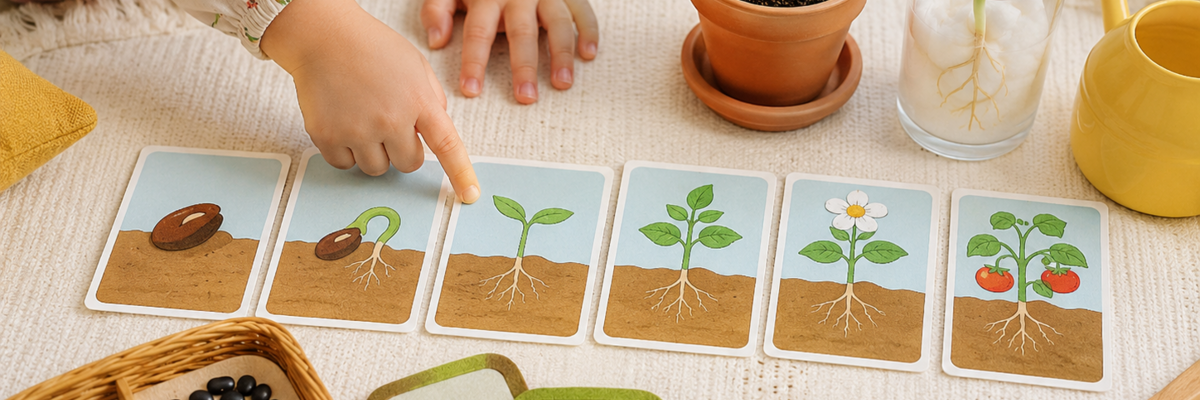
A picture sequence can take a seed from sprouting to flowering in seconds. A real seedling follows a much slower timetable: it may look unchanged for a day, grow in an unexpected direction, or develop differently from the seed beside it. For a preschooler, that waiting is not an inconvenience. It is the part that turns a memorised sequence into genuine observation.
You do not need a detailed botany lesson or elaborate growing equipment. The cards provide the wide view of a complete cycle; the living specimen lets a child notice time, variation, and evidence.
This guide offers age-based expectations, a safe home investigation, hands-on language and sequencing activities, and ways to use Learn&Dream materials purposefully. The goal is not to produce a flawless plant on schedule. It is to help a child predict, look closely, record what actually happened, and revise an idea when nature does something else.
Key takeaways
- Present the life cycle as a loop: a seed can grow into a mature plant that may produce a new generation of seeds.
- Begin with useful everyday words—seed, root, shoot, leaf, flower, fruit—and introduce more precise vocabulary only when it clarifies an observation.
- Cards make the whole sequence visible; a growing seed reveals timing, small changes, and natural variation.
- Keep an investigation focused. Observe one process or change only one condition, rather than altering water, light, warmth, and seed type together.
- Seeds are small objects, experimental materials are not food, and water or glass containers require adult supervision.
- A seed that does not germinate still provides a result to record and compare. It is not a failure by the child.
A child-friendly story of the plant life cycle
Anchor the explanation in one example, such as a bean, sunflower, pea, or tulip. A seed contains the beginning of a young plant and stored resources that support its first growth. When moisture, air, and a suitable temperature are available, the seed takes in water and swells. Its coat opens, and a tiny root usually appears. That root grows into the surrounding material, anchors the plant, and takes up water.
Next, a shoot develops and moves upwards. The first leaves unfold, followed by more roots, stem, and foliage as the young plant grows. It needs light, water, air, a suitable temperature, and a place where its roots can function. Different species need different amounts, so “more water means more growth” is not a sound rule. Too much water can leave too little air around a seed or root.
A mature flowering plant may form buds and flowers. After pollination, many plants develop a fruit containing seeds. Those seeds may be carried away, land where conditions suit them, and begin another cycle. The word “fruit” here includes structures that do not look like a sweet snack. A dry pea pod and the fleshy part of a tomato both protect seeds in different ways.
Choosing the right level for your child
Age bands are flexible. A three-year-old who helps in a garden may notice details that are new to an older child, while a confident card sorter may still need help using a dropper or recording a date. Choose a task the child can already manage, then add one new thinking demand rather than making every part harder at once.
|
Approximate age |
Main idea |
Suitable activity |
A useful next step |
|
2–3 years |
A seed, seedling, and grown plant look different |
Handle large safe specimens, match two pictures, and act out “small to tall” |
Add a third picture and the words “first” and “next” |
|
3–4 years |
Growth happens in an order and takes time |
Arrange 3–4 stages, water with help, and find the root or leaf |
Choose the card that most closely resembles today’s seedling |
|
4–5 years |
A plant has connected parts and can make new seeds |
Order 5–7 stages, draw a daily change, and compare several beans |
Make one prediction and check it the next day |
|
5–6 years |
Conditions affect growth, and specimens can respond differently |
Label dates, measure a shoot, describe evidence, and suggest a comparison |
Discuss a fair check in which only one factor changes |
A simple home investigation: watching a bean germinate
Frame this activity around a narrow question: “What visible change will happen first?” It will not demonstrate the complete life cycle, but it can reveal swelling, the opening seed coat, the first root, and the emerging shoot. Gather a stable clear plastic cup or jar, plain paper towel or cotton pads, two or three dry beans, water, a date label, and a pencil. An adult should manage glass; plastic is often easier with a younger child.
- Observe before adding water. Describe each bean’s shape, colour, size, and hardness. Ask the child to draw or dictate a prediction rather than telling them what must occur.
- Dampen the lining. The paper should feel evenly moist, with no pool of water at the bottom. Germinating seeds need air as well as moisture.
- Place the beans against the clear wall. Tuck them between the paper and container so the child can see them without removing or squeezing them. Label the starting date.
- Choose a warm, bright location that will not overheat. Avoid a hot radiator or harsh direct sun through glass. This observation does not require hiding the container in a cupboard.
- Check once each day. With clean hands, confirm that the paper remains damp and add only a little water if needed. Record one visible detail: swelling, a split coat, a short root, a longer root, or a shoot.
- Finish safely. If there is mould, slime, or an unpleasant smell, an adult should seal and discard the contents and wash the container. Do not taste beans used for an experiment, and wash hands afterwards.
Do not promise a sprout on a particular day. Timing varies with the variety and quality of the bean, temperature, and moisture. If one bean changes and another does not, compare them without inventing a definite cause: “What is the same? What is different? What information are we missing?” That language models honest enquiry.
A preschool observation journal can remain very simple. Use four prompts: date, picture, one measured or noticed feature, and a prediction for the next check. A younger child can dictate a caption. An older child might measure with a paper strip before using a ruler. If you take photographs, keep the container and camera in roughly the same positions so changes are easier to compare.
Why cards and living specimens work better together
Sequence cards compress weeks or months into a row a child can inspect at once. They make it possible to identify a beginning, find a missing stage, compare flower and seed, and replay the cycle many times. Their clarity is also a limitation: an illustration usually shows a tidy, typical specimen and cannot convey waiting, uneven growth, or a shoot bending towards the light.
A living seed restores that variation, but yesterday’s appearance is easy to forget. After each observation, invite the child to select the closest stage card and place it beside the container. Do not insist on an exact match. Ask, “What is similar? What has not happened yet? What does our bean have that the picture does not show?” The card becomes a model for comparison rather than an answer key.
Seven practical plant life cycle activities
1. Seed-to-seed circle
Arrange four to seven stage cards in a line, then curve the final seed card back towards the first. Trace the loop with a finger and tell the story. Next, swap two cards while the child looks away. Ask them to repair the sequence and explain one clue, rather than rewarding speed alone.
2. The missing stage
Build a familiar sequence and remove one card. Offer two possible replacements to a younger child; ask an older preschooler to describe what belongs in the gap. Encourage a full relationship: “A root and shoot appear between the dry seed and the leafy plant.”
3. Seed detectives
Display several kinds of large dry seed in separate sealed clear containers. Compare colour, outline, texture, and size; find the longest or a matching pair. Treat plant identity as a hypothesis, then check a packet or reference image. Close supervision is essential whenever small items are present.
4. Root down, shoot up
Turn the sequence into whole-body movement. Curl into a seed, stretch arm-roots down, slowly lift the shoot, and open hand-leaves. Pair each part with a simple function. Then let the child narrate while the adult follows, which reveals whether the order and words make sense to them.
5. A plant-part walk
Look for stems, trunks, leaves, buds, flowers, and fruits outdoors without picking protected or unfamiliar plants. Compare a tree with a small herbaceous plant. Both grow and have specialised parts, but their scale and lifespan differ. View roots only where they are already exposed or with an adult-prepared specimen.
6. Tomorrow’s prediction
After the daily check, offer two plausible possibilities: will the existing root become longer, or will a leaf begin to unfold? Record the choice and revisit it. A prediction that does not come true is valuable; checking it is the purpose, not an error to erase.
7. One plant across a season
Choose a tree, garden plant, or balcony pot and photograph it periodically. Look for buds, new leaves, flowers, fruits, fading parts, or seeds. Make clear that seasonal change and an individual plant’s life cycle are related but not identical. The long view helps a child connect a tabletop model with the outdoor world.
Learn&Dream materials for exploring plant development
Choose one material that supports the immediate question instead of placing several full sets on the table. A flowering sequence is useful for order, a flower-parts set supports close description, and a tree-parts set expands the discussion to a long-lived plant. Pairing one clear visual resource with one real specimen leaves space for the child to think and talk.
|
Learn&Dream material |
What it makes visible |
A simple starting task |
Connection to real observation |
|
“Stages of Tulip Flowering” educational set |
Changes from early growth to an open flower |
Order three to five contrasting stages and name one change between each |
Compare with a tulip outdoors or a time series of photographs |
|
“Parts of a Snowdrop” three-part cards |
A complete flowering plant, its visible parts, pictures, and labels |
Match a control card, picture, and word card at the child’s level |
Find visible features in a photograph or during respectful outdoor viewing |
|
“Parts of a Tree” three-part cards |
The structure and scale of a perennial plant |
Build a tree model with roots, trunk, branches, and leaves |
Adopt one nearby tree and revisit it through a season |
When choosing cards, check the suggested age, the number and size of pieces, and whether the child is ready to match labels as well as pictures. Start with only the cards needed for today’s question; keep the rest aside so the visual field remains calm and the child can explain each comparison.
Common mistakes and better alternatives
- Presenting growth as instant. Name the waiting and revisit the same specimen over several days.
- Flooding the container. Keep the lining damp, not submerged, so the seed also has access to air.
- Changing several variables together. Observe first; if comparing, alter one condition and keep the rest as similar as practical.
- Explaining before looking. Ask the child to describe visible evidence before supplying the adult interpretation.
- Testing every botanical term. Add precise vocabulary when it helps distinguish a feature, not as a memory hurdle.
- Calling non-germination a failed activity. Record it, check conditions, compare seeds, and repeat with a different batch if desired.
- Forgetting hygiene and choking risks. Supervise small seeds, never taste experimental materials, discard spoiled contents, and wash hands.
Frequently asked questions
At what age can a child begin learning the plant life cycle?
At about two or three, a child can compare a large seed, a seedling, and a mature plant and name one visible change. Ordering several stages, making predictions, and keeping a simple journal can be introduced gradually from three to six. Follow the child’s interest and ability to handle materials safely.
Which seed is easiest to observe at home?
Large dry beans are often convenient because a child can see and handle them easily beside a clear container wall. Use an intact, recent batch and follow any instructions for that variety. Avoid treated sowing seed in an open child-led activity, supervise closely, and remember that experimental beans are not for eating.
How long should germination take?
There is no single deadline. Species, seed quality, temperature, moisture, and other conditions all affect timing. A bean may show changes within several days, but that is an observation to watch for, not a guarantee. Date the journal and describe what is present rather than forcing the result to fit a schedule.
What should we do if the bean does not sprout?
Check whether the paper dried out or sat in excess water, compare several beans, and allow an appropriate amount of time. If mould or an unpleasant smell appears, an adult should discard the contents. You can repeat with a new batch and treat both outcomes as information, never as the child’s fault.
Do all plants have the same life cycle?
All plants develop and produce a new generation, but the details vary. Seed, seedling, mature plant, flower, fruit, and new seed is a useful model for many flowering plants. Ferns, mosses, conifers, and other groups follow different patterns that can become fascinating later investigations.
From a neat sequence to a discovery of their own
A child understands the plant life cycle more deeply when each card can be connected to evidence: the bean swelled, the root emerged first, the shoot lifted, and a leaf unfolded. Cards hold the broad model in view; living observation shows that nature does not have to copy an illustration exactly.
Begin with one answerable question, give the process time, and record what is genuinely visible. Even if only one bean germinates, the child has practised predicting, comparing, measuring, and changing an explanation. Those quiet repeated encounters are a strong beginning for lasting curiosity about the living world.