The Human Body for Kids: How to Explain Its Structure Simply and Without Overload
Short answer: begin with what a child can see and feel: body parts, movement, breathing, and a heartbeat. Next, introduce the skeleton as support and muscles as helpers in movement. Add a few internal organs only after that, giving each one a clear function. A preschooler does not need the whole of anatomy in one lesson. One accurate answer, a short activity, and a chance to revisit the subject build a better foundation than dozens of disconnected labels.
Learning the parts of the human body gives children words for their experiences. It can help them describe discomfort, understand personal safety, care for themselves, and ask more precise questions.
Sequence makes the difference. Start with “what we see outside,” continue with “what lets us stand and move,” and then explore “what works inside.” Vocabulary, interest, and the ability to follow a brief explanation are the useful signs of readiness.
The foundation to offer first
A child does not need a miniature medical textbook. Four connected ideas are enough for a useful first model:
- the body has outer parts that can be seen, named, and located;
- bones, joints, and muscles work together to provide support and movement;
- organs inside the body perform particular jobs;
- organs cooperate in systems rather than working in isolation.
“The heart pumps blood” is more useful than a list of chambers at the beginning. “The lungs help oxygen move from the air into the blood” is more accurate than saying that air simply lives in the lungs. Details can be added once these basic relationships are familiar.
Use a one-layer rule: choose outer anatomy, movement, the skeleton, or three to four organs for one session. End with an action—point, match, build, move, find, or explain.
Adjusting the explanation to age and readiness
|
Approximate stage |
Useful content |
A suitable action |
Do not require yet |
|
Ages 2–3 |
Large outer body parts, the senses, and simple movements |
Point on the body, copy a movement, or match identical pictures |
Accurate recall of many bones or internal organs |
|
Ages 3–4 |
Palm, foot, joints, heart, lungs, and stomach |
Match a picture to the body or notice heartbeat after movement |
A long explanation of systems or causes of disease |
|
Ages 4–5 |
Skeleton as support, muscles, brain, digestion, and circulation |
Build a simple model or match an organ to its function |
Memorising every term without a practical context |
|
Ages 5–6+ |
Main organ systems, relationships, and more specific bone names |
Sort, trace the path of air or food, and check against a model |
Medical conclusions from pictures or self-diagnosis |
This is not a milestone chart. If a three-year-old studies a skeleton image for a long time, support the interest without adding every technical name.
Outer anatomy: from names to functions and boundaries
Begin at a mirror or draw a large body outline. Use calm, precise terms: head, neck, torso, shoulder, elbow, wrist, palm, fingers, knee, lower leg, and foot. Repeat the accurate name naturally: “Yes, that is your elbow; it helps your arm bend.”
Then add functions. Eyes receive light, while the brain helps interpret what we see. Ears detect sound and also contribute to balance. Skin senses touch, temperature, and pain while protecting the body. The nose detects smells and provides a passage for air; the tongue detects tastes and contributes to speech.
Learning about the body naturally includes personal boundaries. Children benefit from correct names for all body parts, an understanding that areas covered by underwear are private, and permission to say no to unwanted touch. Explain necessary care without alarm: a caregiver may help with hygiene and a clinician may perform an examination, but the action should be explained, the child’s dignity respected, and a trusted adult involved as appropriate. Shame and frightening warnings do not improve safety.
Skeleton, joints, and muscles: explain them through movement
The skeleton is not a set of dead sticks. Bones are living tissue. Together, they support the shape of the body, participate in movement, and protect important organs. The skull protects the brain. The spine supports the trunk and surrounds the spinal cord. Ribs form a protective cage around the heart and lungs.
Ask the child to bend an arm. A joint allows the angle to change, while muscles pull on bones to create movement. Muscles do not push bones; they contract and pull, often working in pairs. That is enough detail for a preschool explanation.
Try a “frozen joint” activity: pick up a block while keeping the fingers or elbow as straight as comfortably possible. Discuss why the task became awkward. Never force a joint, hold an extreme position, or imitate a risky movement. The demonstration should remain comfortable and pain-free, with enough clear space.
Internal anatomy: a few organs and one understandable connection
Once the outer map is familiar, add organs. Show approximate locations without pretending that a flat picture provides exact coordinates. The heart lies mainly behind the breastbone with its tip pointing somewhat left; it is not a small object sitting in the far-left corner of the chest.
Six concise explanations are enough for a first cycle:
- the brain receives and processes information and helps coordinate thought, memory, sensation, and action together with the nerves;
- the heart rhythmically pumps blood through blood vessels;
- the lungs take part in gas exchange: oxygen moves from inhaled air into the blood, while carbon dioxide moves out;
- the stomach and intestines take part in digestion; food is broken down, and most nutrients are absorbed through the small intestine;
- the liver performs many tasks, including processing nutrients and helping the body handle certain substances;
- the kidneys filter blood, help regulate water and salts, and produce urine.
Avoid declaring one organ “the most important.” The heart needs oxygen; the lungs depend on nervous-system control; tissues need blood flow and nutrients. A team is a more accurate model than a competition among organs.
Searches for human organs for children often lead to posters packed with details. Select only the images for which you can offer one accurate sentence. Add a relationship in a later session: air enters through the nose or mouth, travels through the airways to the lungs, oxygen enters the blood, and the heart helps circulate that blood around the body.
Answering difficult or unexpected questions
First find out what the child is asking. “How did I get here?” may mean “Where did I grow before birth?” rather than a request for a full explanation of reproduction. Ask, “Do you want to know where you grew, or how you started growing?” Then give a truthful, brief answer that matches the question.
A helpful response pattern has three parts:
- offer one accurate fact;
- connect it with something the child can observe;
- check whether the child wants another layer.
For example: “The heart is a muscular organ that pumps blood. You can feel its rhythm with your hand on your chest. Would you like to know why it usually beats faster after jumping?” If you do not know, say so. “I’m not certain; let’s check a reliable source” teaches intellectual honesty better than a confident invention.
Do not introduce normal body functions mainly through disease. Frightening talk about a heart stopping or “dirt inside the body” does not explain circulation or kidneys. Discuss medical situations when they matter in the child’s life, with simple language and no unnecessary graphic detail.
Five activities that turn a diagram into experience
1. A body outline
Trace a person on a large sheet or draw a simple figure. Place outer body parts first, then add a few organs. Centimetre-level precision is not the goal. Discuss useful relationships: lungs are in the chest, the brain is inside the skull, and the stomach is lower than the heart.
2. Movement and joints
Name an action—squat, raise an arm, turn the head—and ask which joint visibly bent or rotated. An older preschooler can explain which parts moved together. Keep every action within a comfortable range.
3. Notice what changes
Feel several heartbeats at rest, complete about ten comfortable jumps, and notice the rhythm again. This is not a medical test or a competition. The simple conclusion is that working muscles need more oxygen, so breathing and heartbeat usually become faster during activity.
4. Match “organ” to “job”
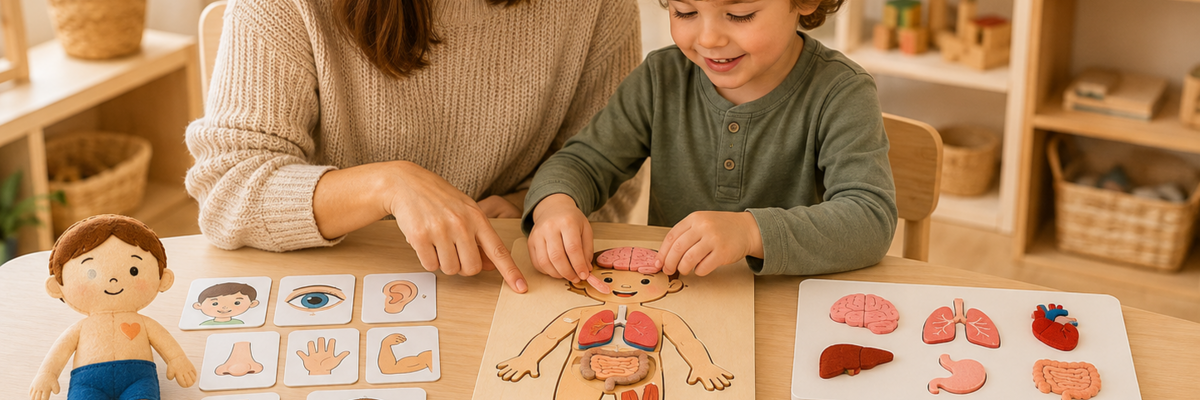
Lay out three organ pictures and three descriptions: “pumps blood,” “help oxygen enter the blood,” and “coordinates and processes information.” Add one new pair after matching becomes confident instead of presenting a whole set at once.
5. Fact, inaccuracy, or question?
Say, “The heart is in the abdomen,” “Bones support the body,” and “Why do people yawn?” The child decides which statement is accurate, which needs correction, and which needs investigation. The game encourages children to classify information instead of guessing every answer.
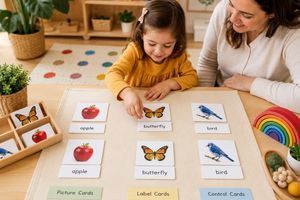
For additional ways to change the action while keeping one familiar set, see How to Use Learning Cards: 25 Games for Children Ages 2–6. When a material has a control card, picture card, and separate label, the guide to Montessori three-part cards and their presentation sequence explains how those elements work together.
Choosing material without presenting too much
The Human Body Structure card category contains materials at different levels of detail. Choose the child’s next manageable question rather than the largest collection. Cards are more useful when the learner matches, moves, explains, and checks instead of only hearing labels.
|
If the child currently… |
Material |
First action |
Possible next step |
|
Names major body parts |
Match images and locate each part on the body |
Add precise names and functions |
|
|
Asks what is inside |
Select three or four organs and place them approximately |
Connect an organ with a function and system |
|
|
Is curious about bones |
Find the skull, spine, ribs, and limb bones |
Discuss support, protection, and movement |
|
|
Studies fingers and gestures |
Compare the picture with the child’s palm |
Add finger movements and more specific names |
When selecting educational toys for children, look beyond the number of terms listed on a package. Ask whether the material supports one clear, independent action. Check the current age guidance, contents, and condition before play.
Common adult mistakes
Introducing every system at once. Circulation, digestion, respiration, and the nervous system create a crowded field when they all arrive together. Keep one map and a few labels.
Replacing accuracy with a story. Metaphors help when their limits are clear. The heart works somewhat like a pump, but it is not a mechanical pump and does not “make all the blood.”
Demanding immediate repetition. Pointing, matching, or explaining a function may show understanding better than reproducing a new term. Let accurate names appear naturally in several activities.
Judging bodies. Compare structure and function without describing one weight, shape, skin colour, or visible difference as the correct one. Images and language should support respect for human diversity.
Diagnosing through play. A picture card cannot explain pain, a rash, shortness of breath, or an unusual heartbeat. The activity provides vocabulary; it is not a medical assessment.
Where a learning activity must stop
Noticing breathing or pulse during play is for understanding a function, not deciding whether a measurement is “normal.” Do not ask children to hold their breath for long, press on the neck, continue through pain, or touch an injured area. Never use a card to persuade a child that a symptom must be harmless.
Seek appropriate medical care for severe or persistent pain, difficulty breathing, fainting, a significant injury, unusual weakness, or another worrying condition. Follow local emergency guidance when the situation is urgent. This article and educational materials are not intended to diagnose or treat illness.
Frequently asked questions
At what age can children begin learning about the human body?
Outer body parts and movement can be named from toddlerhood in ordinary conversation. Add internal organs when the child asks and can connect a picture with one simple function. Readiness matters more than a fixed birthday.
How many organs should I introduce in one session?
Three or four contrasting organs are enough for a first activity, such as the brain, heart, lungs, and stomach. Add one or two only after the child confidently names them or matches their functions.
Does a preschooler need to know the names of every bone?
No. Begin with the skull, spine, ribs, and the large bones of the arms and legs. More detailed names are useful when the child actively seeks them and already understands the skeleton’s general role.
How should I talk about private body parts?
Use correct, neutral names. Explain privacy, the right to refuse unwanted touch, and which trusted adults can help. Answer the present question without shame and describe necessary care or medical examinations calmly.
What if a skeleton or organ image frightens the child?
Put the material away and acknowledge the reaction: “That picture frightened you.” Return to movement, outer body parts, or a book with simpler illustrations. Do not force exposure; revisit the subject only when the child is willing.
Conclusion: build the body map in layers
The human body for kids becomes meaningful through connections, not through the number of memorised labels. An arm bends because muscles pull on bones across a joint. Lungs move oxygen into the blood. The heart circulates blood, while the brain and nerves help coordinate action. Every new word should clarify this map rather than cover it.
Begin with the child’s own movement and outer body, choose one next layer, and finish with a short activity. When a child can point, compare, ask a more precise question, or honestly say “I don’t know,” the lesson is doing valuable work: it is building curiosity, safety, and respect for the body rather than an isolated anatomy list.