How to Teach a Child to Tell Time: Games with a Learning Clock
Learning to tell time does not begin with memorising that the short hand shows the hour. A child first needs to experience events as an ordered sequence that can take more or less time and begin at an agreed moment. Breakfast after waking, outdoor play before lunch, and a story in the evening give clock language a purpose. Only then does the dial become a model of the child’s day rather than a circle crowded with twelve numbers.
This guide moves gradually from a daily routine to whole hours, half hours, quarter hours, five-minute steps, and individual minutes. It does not repeat the calendar concepts of weekdays, months, or seasons. Those longer cycles have their own practical guide on teaching days, months, and seasons. Here the focus is reading an analogue clock and using it to plan what happens next.
Begin with meaning before notation
A preschooler may repeat “at seven o’clock” correctly without knowing whether the phrase refers to morning, evening, or how long the wait will be. Before introducing hands, use sequence and duration words in ordinary conversation: first, after, before, while, longer, and shorter. Ask what happens between getting dressed and leaving, which activity lasts less time, or which event the child is waiting for. An answer expressed by movement, a drawing, or two ordered picture cards also demonstrates understanding.
Keep three questions distinct. “When?” asks for a moment: breakfast begins at eight. “How long?” asks for duration: we will read for ten minutes. “What comes first?” describes order without requiring a number. Children make better sense of the clock when adults do not use these meanings as if they were interchangeable.
Attach a time to a stable event or a clear agreement made for that day. The guide to life skills and everyday routines can help families build short, visible sequences before adding clock times.
Check readiness through action
There is no single birthday at which a child becomes ready, and counting to one hundred is not a prerequisite. Whole hours are accessible when a child can recognise numerals 1–12, order a few familiar events, and distinguish two hands after a demonstration. Five-minute intervals later require counting in fives. Reading every minute also requires understanding the small marks and the change from 59 minutes to the next hour.
Choose or make a clear learning clock
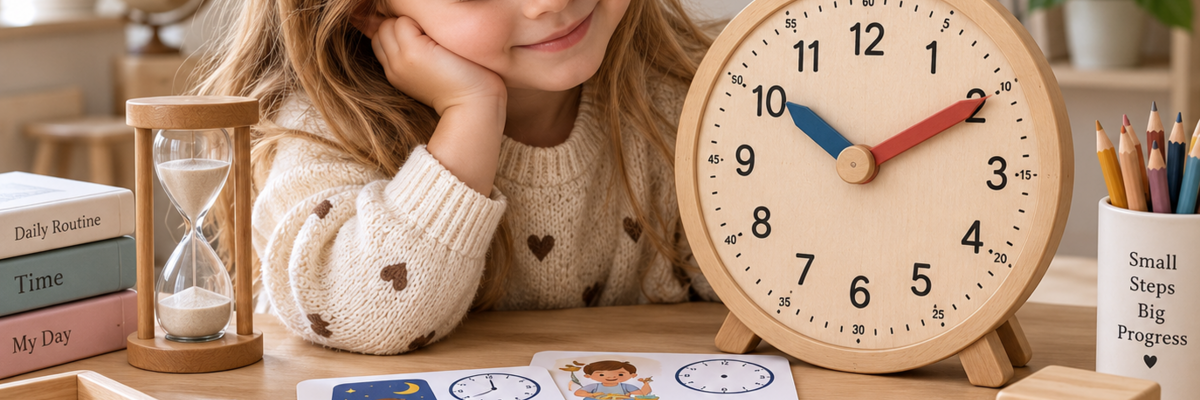
For early practice, a learning clock for children should have a large analogue dial with legible numbers 1–12 and two hands that are easy to distinguish by length. The hands should move in a way that lets the child see their relationship. Their tips need to point clearly at a number or mark, and the mechanism should be easy enough for the child to set without the task becoming a test of finger strength.
The dial can be drawn on sturdy card, built as a simple play model, or replaced by a safe household clock whose hands may be moved. A clock for teaching children to tell time needs no inner 13–24 ring, labels for all sixty minutes, and digital display at the beginning. Too many systems hide the current pattern. Let the child explore, then agree on functional names: short hour hand and long minute hand. Colour may help temporarily, but length should eventually carry the meaning.
A progression from the daily routine to minutes
Move to the next step when the child can apply the current rule to several unfamiliar examples and repair a setting after one focused prompt. Hearing an explanation once is not the same as understanding the relationship.
|
Stage |
Central idea |
First practical action |
Sign that the next step is manageable |
|
Daily routine |
Events have an order and belong to parts of the day |
Arrange 3–4 familiar activities from morning to evening |
Explains before and after without copying |
|
Whole hours |
The minute hand points to 12 and the hour hand names the hour |
Set the starting time of two real activities |
Reads and builds several different whole hours |
|
Half hours |
The minute hand points to 6 and the hour hand lies between numbers |
Identify the hour already passed and the one approaching |
Does not name the approaching hour too soon |
|
Quarter hours |
The circle divides into four equal sections |
Show quarter past and quarter to on the model |
Connects 15, 30, and 45 minutes with the sections |
|
Five-minute steps |
Each number reached by the minute hand adds five minutes |
Count in fives from 12 to a chosen number |
Reads common positions without restarting every count |
|
Individual minutes |
Small marks fill the spaces and 60 begins a new hour |
Build 7:12, 4:28, or the time of a real event |
Explains both hands and checks the result independently |
Stage 1. Build a route through the day
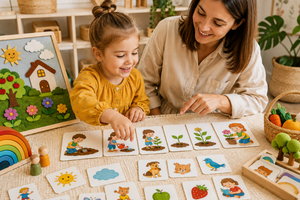
Select three or four events the child knows well: waking, breakfast, a walk, and evening reading. Arrange pictures from left to right and describe the links. Swap two pictures and invite the child to find what changed. The aim is to understand the direction of time, not to judge whether the family follows a perfect routine.
Add morning, afternoon, evening, and night. When the sequence is secure, place a whole-hour clock beside one event card. The number now solves a real problem: it tells everyone when the activity begins.
Stage 2. Explore the dial and whole hours
Find 12 at the top, 6 at the bottom, 3 on the right, and 9 on the left. Trace the clockwise direction with a finger. Ask the child to place the minute hand on 12 and the hour hand on a number you name. Keep the first rule consistent: when the long minute hand is at 12, the short hand tells which hour it is.
Stage 3. Make the half hour visible
Move the minute hand from 12 to 6 and trace the half-circle it travels. During this journey the hour hand does not remain fixed. It moves halfway toward the next numeral. That movement causes a common error: at 4:30 the short hand is between 4 and 5, but the fifth hour has not yet begun.
Ask two questions before naming the time: “Which number has the short hand already passed?” and “Which number is it approaching?” Pair the spoken form “half past four” with the digital record 4:30. Keep the language stable across the first series. Later, children can compare other expressions they hear in the family or community.
Stage 4. Divide the circle into quarters
The four anchor points—12, 3, 6, and 9—divide the dial into equal quarters. Move the long hand through one section from 12 to 3: fifteen minutes, or a quarter of an hour, has passed. At 6, half an hour has passed. At 9, forty-five minutes have passed and only a quarter remains before the next hour. Folding a paper circle twice makes the fractions visible without a long arithmetic lesson.
If direction is still confusing, practise quarter past on times such as 2:15 before asking which hour is approaching at 2:45. Combine both forms only when each journey around the dial makes sense.
Stage 5. Add five-minute steps and exact minutes
Once counting by fives is comfortable, show that the minute hand at 1 represents 5 minutes, at 2 represents 10, and at 3 represents 15. Follow the complete scale from 5 to 60. The printed hour numbers have not changed, but the long hand reads them as five-minute landmarks. Meanwhile, the short hand travels gradually between two hours.
To read individual minutes, count the small marks after the nearest five-minute landmark. At 6:18, for example, the hand has passed 15 minutes and travelled three more marks. Avoid requiring a count of all eighteen marks from 12 every time. Choosing a useful landmark is part of learning to read a clock efficiently. Finish by checking that the hour hand is slightly beyond 6.
Short games for home or a group
|
Game |
How to play |
Skill made visible |
A useful challenge |
|
Time for an activity |
Choose an event picture and set its agreed starting time |
Links a moment to a purposeful action |
Let the child suggest a realistic time |
|
Repair the clock |
The adult sets one hand incorrectly while naming a time |
Checks the separate jobs of the hands |
Include two errors and ask for reasons |
|
Clockmaker’s order |
One player says a time and the other builds it |
Translates language into a model |
Add halves, quarters, or exact minutes |
|
Which comes first? |
Compare two dials within the same part of a day |
Orders moments |
Arrange three different times |
|
How long must we wait? |
Move forward 5, 10, or 15 minutes from a whole hour |
Introduces duration as change |
Cross into the next hour |
|
Human clock |
Place numbers in a circle and let two children become the hands |
Shows the dial spatially |
Give spoken instructions without a picture |
|
Find the partner |
Match analogue faces with digital records |
Translates between formats |
Add close alternatives such as 3:25 and 3:35 |
|
My estimate |
Predict a short activity’s duration, then check it together |
Separates event time from elapsed time |
Compare two tasks without racing |
Plan one ten-minute session
Begin with a meaningful plan: “We go outside at five.” The child sets 5:00 and checks each hand. Next, show 5:30 and trace the minute hand’s route. Finally, let the child create an error for the adult to repair and set the next real event. Keep one new relationship per session; change the story before adding another rule.
Connect analogue and digital time
Introduce digital notation once several whole hours are familiar. Build 7:00 and place the record beside the clock. Explain that the digits before the colon name the hour and the digits after it show minutes. The two zeros mean no minutes have passed since the whole hour. Next, match 7:30, 7:15, and 7:45 with positions the child already understands.
Offer an unfamiliar digital time to build, then an unfamiliar dial to record. Add 24-hour notation only when morning and evening sharing one analogue face makes sense. Begin with a meaningful pair such as 7:00 and 19:00, not a full conversion chart.
Respond to common difficulties precisely
When the hands are reversed, “pay attention” does not identify the problem. Ask which hand makes a full trip during one hour, then demonstrate the journey from 12 back to 12. When 3:30 is called four o’clock, ask which number the short hand has already passed. When every minute count begins at 12, point to the nearest five-minute landmark.
Allow self-correction before moving the hands yourself. Give one observable cue, and reduce the demand if errors multiply. Build time by hand before relying on worksheets, which do not show movement well. For separate numerical practice, use the activities in teaching number and quantity from 1 to 10 rather than turning every clock game into a counting test.
Use real agreements at home and shared roles in a group
At home, use genuine plans such as departure or reading time. The child sets the model, and an adult finds the same time on a household clock. In a group, rotate the roles of caller, two hands, and checker so the quickest reader does not do all the thinking. Beginners may copy a card; experienced players can follow oral instructions or detect an error.
Materials involving numerals and quantities are available in the Language and Mathematics category. Choose from current descriptions, age guidance, and the action the child will actually perform; a toy that contains numbers does not automatically teach time. Other educational toys for calm home activities can provide variety, while regular use of a clock in a meaningful situation remains the essential practice.
Notice progress without turning it into an exam
Observe four actions: reading, setting, comparing, and using time in a new story. Note the kind of help rather than only right or wrong. Slow self-correction shows more than a quick guess. Add a stage after several brief encounters in different contexts; time concepts strengthen alongside counting, language, planning, and daily experience.
Frequently asked questions
At what age should a child start learning to tell time?
Sequence words and parts of the day can be explored in early preschool years. Introduce whole hours when the child recognises 1–12, distinguishes the hands, and can hold a brief rule in mind. Readiness for the particular action is more useful than one universal age.
Should analogue or digital time come first?
An analogue model makes the circle, fractions of an hour, and movement between moments visible. Add digital notation as another way to represent a time the child already knows: whole hours first, followed by halves and quarters. Practise translating in both directions instead of memorising matching cards.
Why does my child confuse the hour and minute hands?
The roles may have been explained verbally without enough experience of movement. Turn the minute hand through a complete circle and watch the hour hand move to the next number. Keep one stable cue for several sessions: the long hand counts minutes; the short hand shows the hour.
How can I explain half past without creating confusion?
Show that the hour hand has left one number but has not reached the next. First ask which hour has been passed and which one is approaching. Then connect the spoken form “half past four” with 4:30 and build several new examples.
Must a preschooler be able to name every minute?
No. Whole hours, halves, and quarters are enough for many everyday plans. Individual minutes become useful when the child understands five-minute steps, notices the small marks, and wants greater precision. A secure model matters more than racing through all sixty positions.
Conclusion
Time becomes understandable when every symbol grows from experience. A child first orders familiar events, links one event to a whole hour, sees halves and quarters of the circle, counts five-minute steps, and only then reads individual minutes. The analogue dial reveals movement, while the digital record gives a concise notation for a moment that already makes sense.
Choose one genuine agreement, one short rule, and a few minutes of play. Alternate reading, building, comparing, and repairing. A teaching clock then helps a child wait, plan, and take an increasingly active role in the day.